All About the Acuva Wanderer™ 2.0 RV Water Purifier
Share article
Adventuring off-grid can be tricky when it comes to finding a water source you trust. You never know what kind of water quality you’re going to have at your destination. If you’re an avid traveler, you probably know that many water sources can be precarious, containing mud, rust and other bacteria. These things can quickly spoil your adventure by causing illness. That’s why water filters and water purification systems are important, especially for those who like to travel in RVs or enjoy a day on the water in a boat.
These systems keep the water supply in your RV or boat clean and safe to drink by removing impurities that can be potentially harmful to your health.
What is an RV Water Purifier?
Simply put, RV water purifiers are not necessarily RV water filtration systems. Average inline filters don’t prevent most bacteria or viruses from flowing through the water lines in your RV. An RV water purification system employs powerful UV-LED technology to eradicate waterborne illnesses, which simple RV water filter systems won’t do.
What Makes the Acuva Wander RV Water Purifier Different?
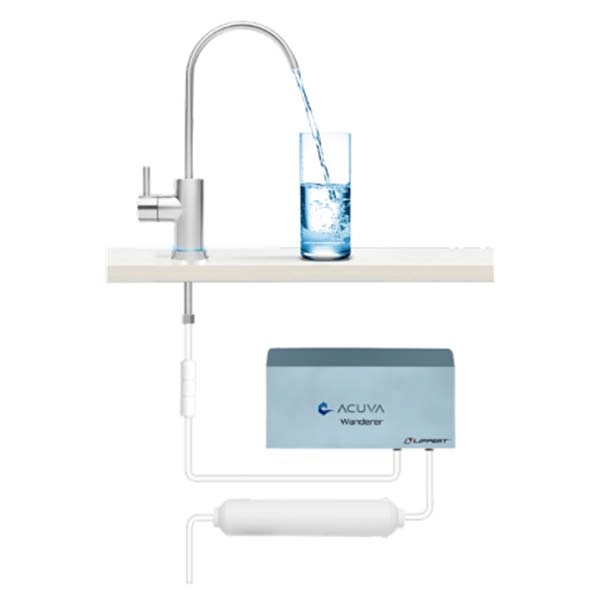
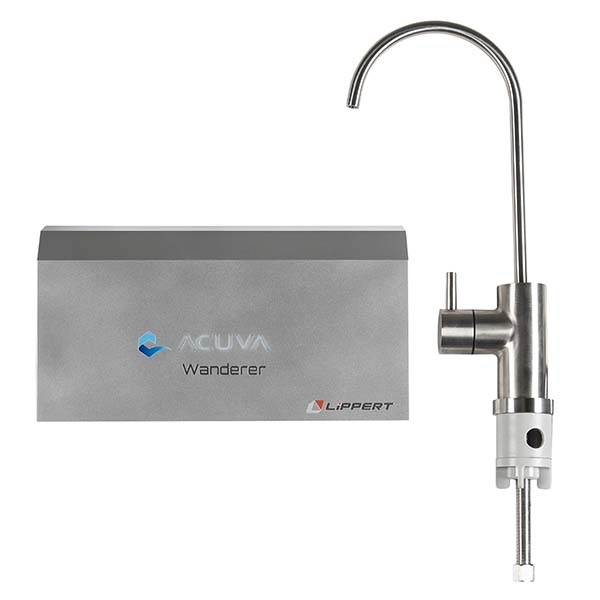
The Acuva Wanderer 2.0 water purification system is the most powerful, low-maintenance water purifier specifically designed for RVs, boats and off-grid living. It employs a two-stage process to purify water. First, sediment, lead, chlorine and other contaminants are removed by an advanced pre-filter, which improves the taste and smell of your drinking water. Then, it's treated by UV-LED technology to remove bacteria.
UV-LED Purification vs. Reverse Osmosis
The Acuva Wanderer is also more efficient when compared to a traditional reverse osmosis (RO) system. This side-by-side comparison shows the differences between the two systems and illustrates a clear picture of why UV-LED technology is superior:
UV-LED System
- Works on low pressure (even at 12 psi water pressure
- Low maintenance
- Does not waste water
- Keeps healthy minerals like calcium and magnesium in water
- Compact
- No need for a storage tank
- Low ownership cost

Reverse Osmosis System
- Requires high water pressure (at least 40 psi)
- High maintenance due to frequent cartridge replacement
- Up to 70% of water can be wasted
- Removes calcium and magnesium
- Bulky
- Needs a storage tank
- High ownership cost
The Environmental Impact of RV Water Purification Systems
Water purifiers for campers are energy-efficient and low-maintenance. They provide clean and safe drinking water to end users while eliminating single-use plastics like water bottles and jugs. Each unit can dispense up to 31,700 gallons of water over its lifetime, saving up to 240,000 water bottles from ending up in landfills. This makes a positive social impact and creates a healthier planet for future generations.
Why You Need an RV Water Purifier
The Acuva water purifier provides clean and safe drinking water to campers, boaters, lake house owners and outdoor enthusiasts of all kinds. This system is packed with a variety of features that make it an easy upgrade for your off-grid water source.
Health & Safety
The Acuva Wanderer water purifier for RVs and boats makes water safe to drink by removing bacteria and impurities through UV-LED water purification technology, while keeping healthy minerals, like calcium and magnesium, intact. It’s also mercury-free to eliminate contamination risks.

Improved Water Taste & Quality
Each Acuva Wander water purification system pre-filters water to remove chlorine, lead, heavy metals, mercury, carcinogens and other contaminants, providing safe drinking water with improved quality, taste and reduced odor.

Efficiency & Sustainability
The Acuva Wanderer is specifically designed to run on a 12V battery source for low power consumption. It is activated by a flow sensor, so it consumes power only when fresh water is being dispensed and purifies at a 1:1 ratio. Additionally, a single Acuva Wanderer unit can pay for itself in less than a year while reducing the need for single-use plastics that end up in landfills.

Minimal Maintenance
An easy-to-install camper water purifier, the Acuva Wanderer is low-maintenance and hassle-free. Simply change out the pre-filter as needed. Other than that, it’s completely hands-off.

How to Install an Acuva Wanderer RV Water Purification System
The Acuva Wanderer RV water purifier is compact and easy to install under the sink of your unit. Before you start the installation process, unpack the box and gather up the tools listed below.
In the Box
- Water purification unit
- Advanced pre-filter (inline filter)
- AC to DC adapter
- Installation rail
- Mounting hardware
- Smart Faucet and accessories
- User manual
Tools Needed
- Cordless drill
- Appropriate driver bits
- Appropriately-sized wire nuts
- Cutting sheers
- Wire cutters
- Wire strippers
- Utility knife
- Teflon tape
- Adjustable wrench
- Tape measure
- Zip ties
- 5/8" drill bit
- Small drill bit for a pilot hole
- Shop towels
- Safety glasses
Installation
The installation of an Acuva Wanderer unit can be done with or without a Smart Faucet. Determine which installation will be necessary for your needs and proceed with the installation using the instructions below.
Installation with Smart Faucet

Installation without Smart Faucet
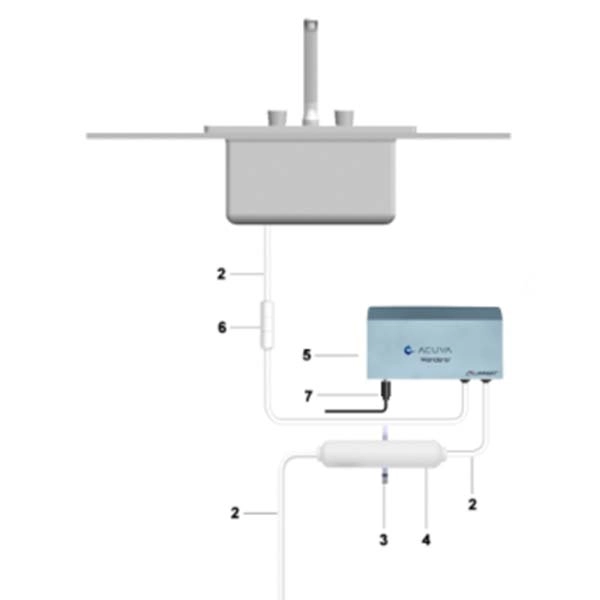
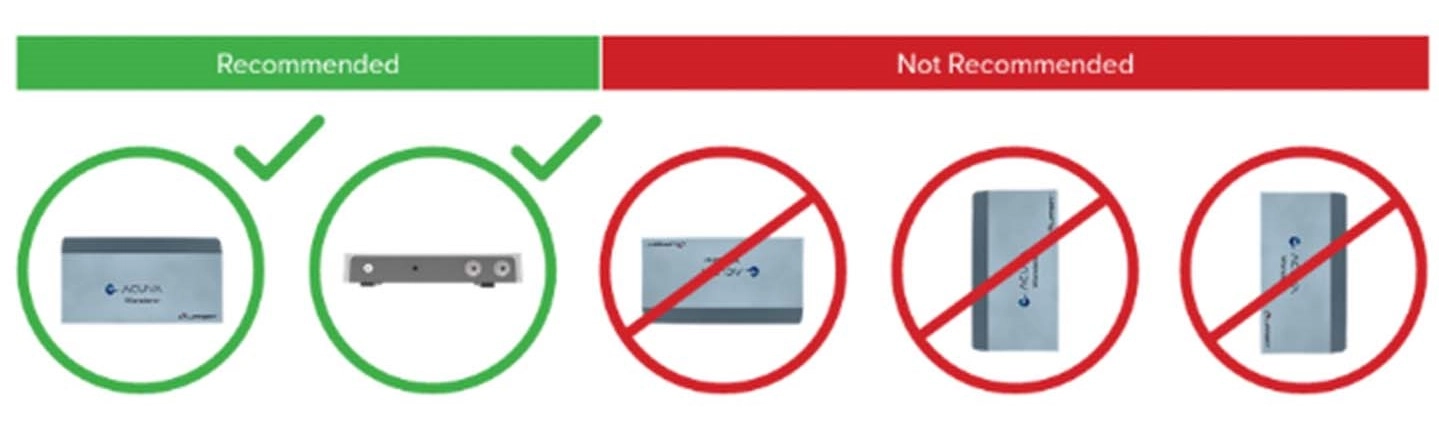
- Find an under-counter position for the Acuva Wanderer 2.0 and pre-filter to be mounted, allowing space for all tubing to be connected without needing to bend to the point of pinching or folding.
- Mount the DIN-rail that will support the device with two #10 wood screws and the filter clip(s) for the pre-filter with the two remaining screws. The filter may have one or two mounting clips.
- Install the 1/2" PEX to 1/4" OD Tee and shutoff valve to the cold-water line, and ensure the cold-water line is not under pressure by turning off the water and/or cutting the flow with an upstream valve. Expect some water to drain from the cold-water line while cutting it. Insert the 1/2" cold-water lines to the 1/2" female ends of the Tee, pushing the tubes into the Tee as far as possible and pulling gently to assure that the seal is secure.
- Cut a length of 1/4" tubing that will connect the Tee to the pre-filter. Feed the compression nut and brass ferrule over the tubing, and insert the tubing into the Tee. Use a wrench to firmly tighten the compression nut until the tubing stays in place when pulled.
- Remove the protective caps from both ends of the filter by first removing the safety stops, then pulling the caps off. Connect the 1/4" tube from the Tee into the inlet side of the pre-filter while making sure that water will flow in the proper direction as indicated on the filter. Push the tube into the filter as far as possible and pull gently to ensure it is properly sealed. Snap the pre-filter into its wall-mounted clip(s).
- Install Acuva Wanderer 2.0 by mounting it to the DIN-rail.
- Cut a length of 1/4" tubing that will connect the pre-filter to the Acuva Wanderer 2.0’s inlet and push both ends of the tubing into place. Pull on each gently to ensure it is properly sealed.
- Cut a length of 1/4" tubing that will connect the device and the output faucet or appliance, and install the flow restrictor at a point along the tube that is convenient – noting the flow direction of the restrictor. Connect the tubing to the desired water faucet or appliance. For each push-fit connection, pull the tubing gently after installation to ensure it is secure and sealed.
Note: Please use Teflon tape sealant (or other appropriate sealants) on all threaded fittings and connections.
Mounting the Unit
- Engage the spring-loaded mechanism of the mounting clips on the device by hooking the clip onto the bottom edge of the DIN-rail and applying slight pressure upwards.
- As bottom portion engages, tilt the upper hook towards the DIN-rail.
- Release the spring mechanism once the unit is mounted on the rail.
Installing the Smart Faucet
- Drill a 3/4" hole into the countertop where the Smart Faucet will be inserted.
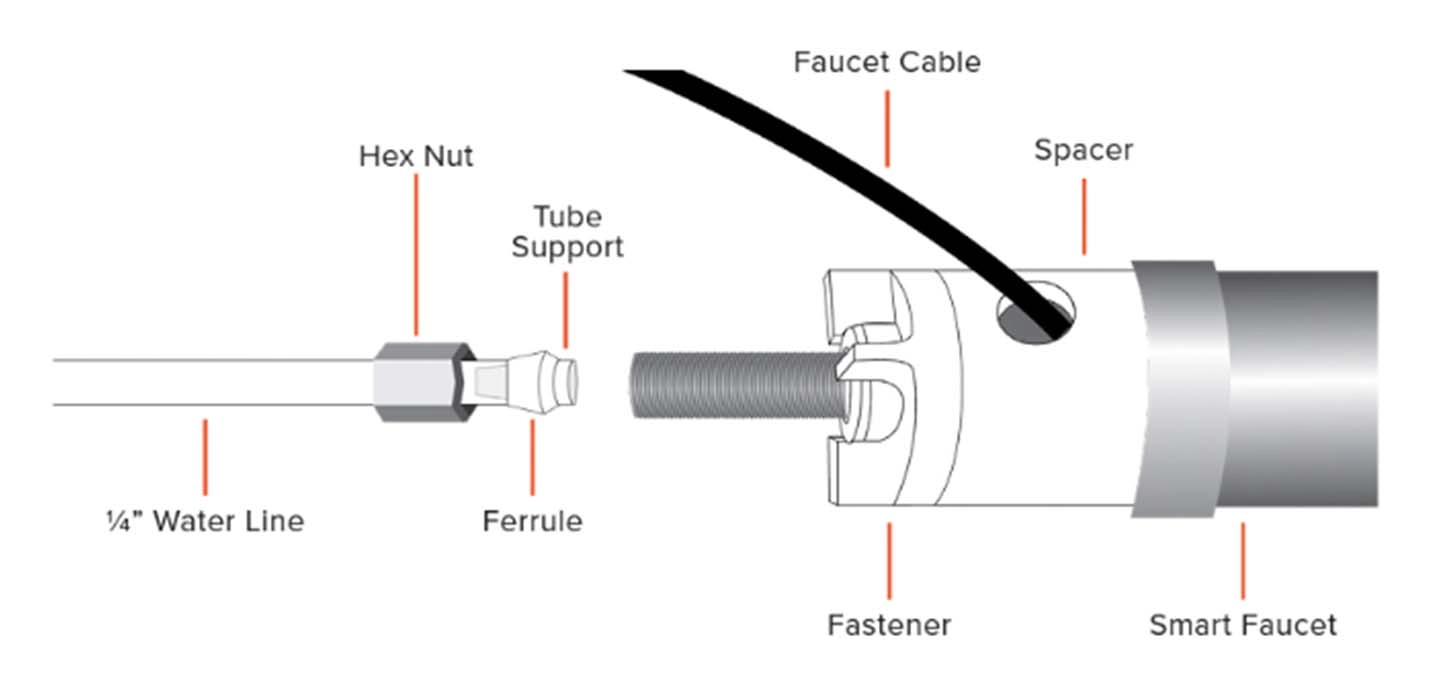
- Thread the faucet cable into the 3/4" hole and insert the faucet stem into the hole.
- Thread the faucet power cord through the plastic spacer under the counter to ensure that the cord is not pinched against the counter when the faucet is fastened into place. Make sure that the spacer’s O-ring seal is facing up to seal against the counter.
- Add the plastic threaded fastener to the faucet stem and tighten the fastener against the spacer to secure the faucet into place. Make sure that the faucet is positioned properly as required before tightening the fastener.
- To connect the 1/4" water line to the faucet stem, slip the hex nut onto the tube, followed by the plastic ferrule and plastic tube support. Press the tube end and ferrule to the bottom of the faucet stem and tighten the hex nut by hand, then tighten the nut one quarter turn with a wrench.
Conditioning & Powering the Unit
For DC power source applications, installing a 3A 250V slow blow fuse will provide additional electrical protection.
- Once the device is connected to the cold-water line, flush the unit at 4 L/min (1.05 gallons/min) for one minute to ensure water entirely floods the unit. During this time, ensure all connections are tight and sealed.
- Connect the DC power source or AC to DC power adapter to the device. Hand-tighten the nut to the threaded jack to secure it. Do not use a wrench or pliers to tighten the plug, power jack or inlet/outlet fittings as this may cause damage to the device.
- If there is no water flow on powering up, the Acuva logo should glow green for 30 seconds.
- Turn on the faucet. The logo will glow blue which indicates the UV-LEDs are working. If the smart faucet is installed, its base will glow blue as well.
- Turn off the faucet and the device will automatically go into standby mode.
Acuva Wanderer Owner’s Manual
For further installation help, troubleshooting, maintenance instructions and product information, download the Acuva Wanderer 2.0 user manual.