
The Ultimate Guide to Trailer Jack Replacement
Share article
The Ultimate Guide to Trailer Jack Replacement
If you're looking to replace your trailer jack, you're in the right spot! In this comprehensive guide to trailer jack replacement, we'll go over everything you need to know, from shopping for the best options to installation, to making the most of your new jack and keeping up on maintenance.
We'll also walk step-by-step through the process of using your new jack safely and which upgrades to consider for your trailer setup.
Tap to jump to a topic:
Disclaimer: These photographs, recommendations, and approximations are intended for demonstration purposes only and do not reflect the specifications of any particular tow vehicle, recreational vehicle, or trailer. Always consult the manufacturer’s Owner’s Manual.
What Does Trailer Jack Actually Mean?
First, let’s make sure we’re all on the same page for what we mean when we use the term trailer jack. In the world of trailers and RVs, the word jack can actually mean lots of different things to different people.
For some, a jack is the part of the trailer that keeps it level. For others, a jack is used to stabilize the trailer. Still for others, a jack means the tool that’s used to lift or jack up part of the frame to perform maintenance.
In this guide, when we refer to a trailer jack, we are talking about a trailer tongue jack, the lifting apparatus on the tongue of a trailer. This type of jack is comprised of a tube or body, as well as a leg or post. A trailer jack (a.k.a. trailer tongue jack) allows the trailer tongue to be raised or lowered as needed, particularly to enable the trailer to be hitched up to a vehicle.
This is what we’re talking about when we say trailer jack:

Tongue Jacks vs. Stabilizer Jacks vs. Leveling Jacks

Tongue Jacks
Tongue jacks are mounted on the front of the trailer and are used for raising and lowering the trailer tongue and coupler portion of the trailer frame.

Stabilizer Jacks
Stabilizer jacks are used to stabilize an RV or other trailer once it’s set up. They are intended to absorb shifting weight, keeping the unit stable. Contrary to some ideas, they are not for leveling an RV.

Leveling Jacks
On the other hand, leveling jacks are designed for leveling the trailer. Some RV trailers have manual leveling jacks while others have an automatic leveling system.
To learn more, check out our guide on the differences between jacks, stabilizers and levelers.

Head
The top portion of a jack is called the head. The head contains the gears and other mechanical components to allow the jack to raise or lower its leg. This is where the transmission of power goes from the user’s hand-cranking motion into the lifting force of the jack leg. The jack head is usually topped with some kind of weather-resistant cap.
Outer Tube / Body
The outer tube is the main body of the trailer jack. Most jacks consist of an outer tube and an inner tube or leg. The outer tube attaches to the trailer tongue and provides the primary structure for the jack.
Inner Tube / Leg
The inner tube or leg is the part of the jack that moves up or down to lower or raise the trailer tongue. This is a secondary tube that fits inside the outer tube.
Handle
The handle is the cranking apparatus that allows the user to operate the jack. Turning the handle one way will raise the jack leg, and turning it the other way will lower it. Some handles come with a grab handle, while others have a knob. Some are foldable, and others are fixed. Still other types of jacks have a handle that detaches completely.
Foot (or Wheel)
The foot is the part of the trailer jack that touches the ground and provides a stable base. A jack foot is usually a simple metal plate with an attachment pin or bolt to mount onto the jack leg. Some jacks are sold with a foot included. Others are without. Some also have a wheel, instead of a foot, for added mobility.
Mounting Bracket
The mounting bracket allows the trailer jack to be attached to the trailer frame. Some brackets bolt into place, while others are welded on. Swivel-style brackets allow the entire jack to rotate, so it can swing up and out of the way during travel.
Distinctives of an Electric Trailer Jack

- Electric Jack Head - Like a manual crank jack, the head of an electric jack is the power transmission center of the unit. Instead of harnessing the user’s cranking efforts, an electric jack head uses the trailer battery or another 12-volt power source to power its internal gears and raise or lower the jack leg. An electric jack head also contains the buttons, LEDs and other electronic components, keeping them protected from the outdoor elements.
- Outer Tube / Body - An electric jack has an outer tube or body in which the inner tube or leg can slide up or down. The outer tube also holds the mounting bracket to attach the jack to the trailer tongue.
- Inner Tube / Leg - The inner tube or leg of an electric jack is virtually identical to that of a manual jack. It is a round metal tube that moves up or down depending on which button the user presses, and it provides an attachment point for the jack foot.
- Controls - Instead of a handle, electric jacks use buttons to allow the user to raise or lower the trailer jack. The controls are built into the head unit, and some feature an LED backlight for easier viewing in low-light conditions. It’s also worth noting that electric tongue jacks come with an emergency manual handle to enable operation if battery power is not available.
- Foot - Most electric trailer jacks come with a foot plate on the bottom that provides enhanced stability for the trailer tongue. The foot is usually detachable and may be equipped with a height adjustment feature.
- Mounting Bracket - The mounting bracket of an electric trailer jack is the metal piece that attaches the jack directly to the trailer, whether with bolts or with welds.
Overview of Jack Styles
There are several different styles of trailer jacks to choose from, each with its own pros and cons. Some popular options include the following:


Overview of Jack Styles
There are several different styles of trailer jacks to choose from, each with its own pros and cons. Some popular options include the following:
Different Types of Trailer Jacks
Manual Jack
A manual jack is simply a trailer jack that’s operated by hand with the user’s own strength. There is no electric assist. Manual crank jacks or hand-cranking jacks are perhaps the most common on any given trailer type. Manual jacks typically come in two styles: top-wind and side-wind.

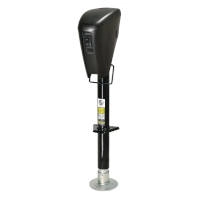
Electric Jack
An electric jack is a trailer jack that uses electricity to move the leg up or down with the press of a button. The power source is usually the trailer’s onboard battery or the tow vehicle. Electric jacks can also have a smart feature that allows them to extend to a preset position with just a single touch of the button.

Electric vs. Manual
The biggest difference between electric jacks and manual jacks is that electric jacks use a powered motor to raise and lower the jack leg, while manual jacks use a hand crank. Electric jacks are more convenient and require less effort, but they also tend to be more expensive and can be less reliable if the battery dies. Note that every electrical trailer jack should come with an emergency backup crank handle.
Electric jacks can also have extra features for even more convenience, such as auto-level capabilities and an integrated LED light.
Smart Jack
A smart jack is a type of electric jack that operates with the single press of a button. With one touch, the jack leg raises or lowers to a prescribed height. In the Lippert Smart Jack™, this takes the form of our Auto-Hitch Memory function – the jack automatically remembers the exact hitch height needed for your trailer, making hookup a breeze.
One thing to keep in mind with a smart jack is that a 12-volt battery will be needed as the power source.

A-Frame Jack
A-frame jacks get their name from the A-frame trailers they’re used on. This type of jack is designed to be mounted on the A-frame tongue of the trailer, being fixed in place with no swivel option (more on that shortly).
A-frame jacks are quite common, especially on RV trailers, and they can be manually operated or electrically powered.

Jack with Wheel
Some jacks have a built-in wheel on the bottom instead of a foot, making it easier to pivot and even move the trailer around by hand. They are typically designed for use on smaller, lighter trailers, such as small boat trailers.
The mobility that jacks with wheels provide also makes hookup easier because it allows the trailer tongue to be adjusted into position by hand, instead of needing the tow vehicle to be repositioned.

Heavy-Duty Jack
Heavy-duty jacks are in a class all their own. Most are designed to be welded directly to the trailer frame. Instead of bolting into place or using a separate bracket component, these powerful jacks are fused, metal-on-metal, with the trailer tongue. They are used on livestock trailers and flatbed equipment haulers, and they have particularly high weight capacities, even up to 12,000 pounds.

Tube Style: Round vs. Square
When it comes to tongue jacks, one other distinction worth pointing out is the style of the jack tube or body. The majority of trailer jacks have a round-tube body, as well as a round-tube leg.

However, some of the heavier-duty jacks feature a square tube. Other than the appearance of the shape, there isn’t a significant difference when weighing your buying options.
Because they fall into the heavy-duty category, square-tube jacks require a direct-weld installation, and the square shape allows for more surface area to weld the unit onto the trailer frame.
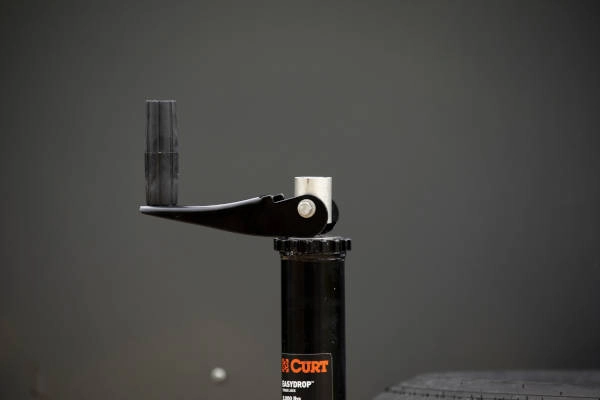
Drop Leg Option
Some jacks, including some heavy-duty weld-on jacks, feature a drop leg. This type of jack leg makes it faster and easier to hook up or unhook your trailer. Jacks with a quick-drop leg usually have a spring-loaded pin that holds the leg in place within the inner lift tube. When you release the pin, the drop leg is free to move independently of the lift tube, allowing the leg to instantly drop to the ground or be lifted back up into the tube by the user.

If you’re unhitching your trailer with a quick-drop-leg jack, you don’t have to stand there turning the crank several rotations as the jack leg slowly makes its way to the ground. Instead, simply pull the pin and let the leg fall freely.
When it’s time to hitch up again and hit the road, simply raise the jack leg with the crank handle enough so that it clears the ground. Then, pull the pin once more and slide the drop leg the rest of the way up.
Marine Jack
Marine jacks are specially designed for use on boat trailers. They are typically made from durable materials that can withstand the harsh marine environment for corrosion resistance.
Boat trailer tongue jacks come in a variety of sizes and weight capacities, so it's important to choose one that’s suitable for your specific needs.

Swivel Jack
Swivel jacks are designed to rotate on their mounting point for maximum ground clearance during travel. The swivel-mount allows the entire jack tube to rotate up and out of the way, keeping it well protected for travel. A spring-loaded pull-pin keeps the tube secured in either position.
Usually, swivel trailer tongue jacks have relatively lower weight capacities than their fixed counterparts, and some are available with a wheel on the bottom for convenient mobility.


Side-Wind vs. Top-Wind
The difference between side-wind and top-wind jacks is mainly about user preference and ergonomics. Side-wind jacks have the handle on the side. Top-wind jacks have the handle on top.

If you’re choosing between the two, it’s a simple question of which one feels more comfortable to operate. For some, a top-wind jack feels more natural, while for others, side-winding operation can provide that extra feeling of leverage and control.
You may also wish to consider the design of your trailer. If there are any parts of your trailer tongue that might obstruct operation, you may need to select accordingly.
Grab Handle vs. Knob
Another difference in trailer jack handle design is the grab handle versus the knob. A grab handle has a cylinder shape that allows you to wrap your hand around it like a bike handlebar.
The knob, on the other hand, has more of a crown shape, allowing you to grasp the knob with a claw-like grip.

The knob-style handle is typically only found on top-wind jacks, while the grab handle is on both top-winders and side-winders. Once again, it’s a matter of preference and ergonomics. Which one feels more comfortable for you personally? If you feel like the grab-handle-style gives you a better grip, then choose a jack with a grab handle. If you like the feeling of the knob style, then choose a jack with a knob.
Drill-Operated Jack
Drill-operated jacks are a sort of hybrid jack, combining the features of manual and electric. They are designed for use with a standard power drill to raise or lower the leg. This adds the convenience of an electric jack, using the power of electricity for less operational effort.
However, a drill-operated jack also supplies the option for manual raising and lowering, featuring a standard crank handle. If you don’t have your power drill handy or it dies, you can always rely on manual power and elbow grease as a backup!
One thing to consider before purchasing a drill-operated jack over a purely electric model is that it does add one more thing to the packing list. It may be obvious, but in order to operate your jack with a drill, you need to bring the drill with you wherever you tow.

Trailer Jack Mounting Options
When choosing a new jack, it's important to consider the available mounting options. You need to choose a jack that can be mounted in a way that works best for your specific needs, and to ensure that the jack is compatible with your trailer's mounting points.
One of the best ways to do this is to look at the existing or old jack on your trailer. However, you may wish to upgrade your jack from a bolt-on system to a weld-on, or vice-versa, depending on your preferences.
Weld-on
Weld-on jacks are designed to be welded directly to the trailer frame. They require metal-on-metal contact and are permanently fixed once installed.
Weld-on jacks come in a few different varieties. Some are designed so that the body of the jack gets welded directly to the frame, while others come with a separate bracket that serves as an intermediary component between the two. The bracket may include a swivel feature that allows the jack to swing up and out of the way for travel.
Overall, weld-on jacks are the most secure option and typically have the highest weight ratings. However, it is important to note that a weld-on jack requires welding equipment for installation. You may need to seek professional assistance for this option.
Bolt-on
Bolt-on jacks are designed to be mounted onto the trailer using hardware, namely nuts and bolts. This is a more DIY-friendly option, but it may not be as secure as its welded counterpart. Bolt-on mounting hardware affords the option of easier removal of the jack if needed, and it allows installation to be completed with a few simple hand tools.
A Note about Jack Materials & Finishes
Many different jacks are designed to be installed with either option; that is, welded or bolted into place. While the majority of trailer jacks are constructed from heavy-duty steel, there are some aluminum options, and it is important to know which one you have before attempting to weld.
Additionally, almost all jacks come with some kind of protective finish to keep them resilient to the outdoor elements. Some have a powder coat finish, and others a zinc plating. These help keep the steel underneath from rusting when exposed to moisture and road salt. However, before welding your jack into place, you need to make sure you take the necessary steps to prep the mounting surface to achieve a proper weld.
Bracket-Mount
Bracket-mount jacks are mounted to the trailer frame using an intermediary piece of metal, namely a bracket. Some may require drilling holes into the trailer frame, while others can mount over the top of it. Brackets can also differ in style and function, including swivel-style, fixed, horizontal and vertical.

Pipe-Mount
Pipe-mount jacks are mounted to a round pipe or tube that is attached to the trailer frame. This allows for swivel capabilities of the jack as it rotates around its cylindrical mounting point, and it can be locked in either the vertical position for raising / lowering or in the horizontal position for towing.

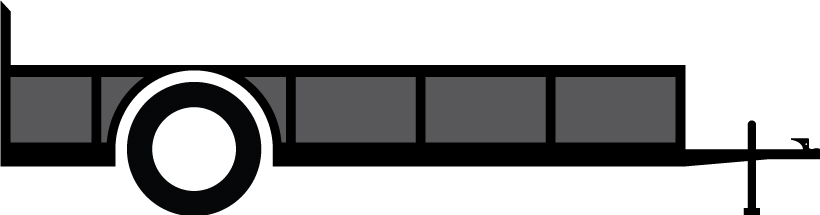
Trailer Jacks by Trailer Type
Trailer Diagram
Trailer Type
Jack Type
Jack Image


Trailer Jacks by Trailer Type
Trailer Diagram
Trailer Type
Jack Type
Jack Image
What Size Jack Do I Need?
When shopping for a new jack, there are a few key dimensions to consider, not just in length or distance but also weight capacities. It’s important to select the jack that’s best for your trailer size and style.
Below is a trailer jack chart showing the key dimensions and capacities of each jack type. These figures should provide some general guidelines for which types of jacks will work for your trailer and which ones won’t.
For example, if you have a 30,000-pound trailer, a small swivel-style jack obviously won’t get the job done!
Review the information in the table and read more about each of the dimensions in the sections below.
Capacities & Stroke by Jack Type
Jack Type
Jack Example
Max Lift Capacity
Stroke


Top-Wind

2,000 to 8,000 lbs.
10" to 15"
Side-Wind

1,000 to 12,000 lbs.
10" to 15"

Capacities & Stroke by Jack Type
Jack Type
Jack Example
Max Lift Capacity
Stroke
Top-Wind
2,000 to 8,000 lbs.
10" to 15"
Side-Wind
1,000 to 12,000 lbs.
10" to 15"
Trailer Jack Lift Capacity vs. Support Capacity
All trailer tongue jacks should come with two weight ratings, and it is important to make a distinction between the two. The first rating is lift capacity, and the second is support capacity.
The lift capacity is the maximum weight that the jack can lift vertically; that is, while it is raising the trailer tongue. This specifically pertains to the trailer jack in motion. As the jack is operating (whether manually cranked by the user or electronically), how much weight is it rated to hold up? This is the lift capacity.
On the other hand, support capacity is a static rating. It refers to the weight rating of your trailer jack when it’s in a resting position. The jack leg could be fully extended or retracted, but either way, it isn’t moving. When your trailer is parked and the tongue is simply resting its weight on the jack, how much weight can the jack handle? This is the support capacity.
The support capacity will characteristically be higher than the maximum lift capacity. This is because a jack is under greater strain when it is in motion versus when it is standing still. It takes more effort to lift something upward, working against gravity, than it does to simply hold it in place.
Make sure the jack you choose for your trailer meets or exceeds the needs of your trailer for both lifting and supporting.
Also, Tongue Weight vs. Gross Trailer Weight
As you think about trailer jack capacity, also keep in mind the difference between tongue weight and gross trailer weight. Tongue weight is the weight only at the front end of the trailer, while gross trailer weight is the weight of the entire trailer.
Tongue weight should be about 10-15% of the gross trailer weight.
This is important to know when replacing your trailer tongue jack because a jack doesn’t need to support the weight of the entire trailer, nor is it designed to. The lift capacity and support capacities listed for any particular jack should be considered in light of your trailer’s tongue weight, not its overall weight.
Understanding Stroke: The Vertical Travel of Your Jack Leg
The primary purpose of a trailer jack is to add the ability to easily raise and lower the trailer tongue. This is especially key when hitching up your trailer to your tow vehicle.
This raising and lowering your trailer, using the jack leg, is called vertical travel or just “travel.” The maximum distance your jack can travel vertically is called the stroke.
If you were to measure the length of the jack leg from its fully retracted position out to its fully extended position, this would be the stroke.

When looking for the right amount of jack stroke or vertical travel, consider the coupler height of your trailer, as well as the ball height of your vehicle’s trailer hitch. The stroke of the jack should provide the necessary height your coupler will need to clear your hitch when coupling or uncoupling your trailer.
Extended Length vs. Retracted Length
Because the primary purpose of a trailer jack is to go up and down, it’s also important to think about the overall height of the jack, as well as the height when the jack leg is fully extended versus when it’s fully retracted.
It goes without saying, but the extended height of the jack will be greater than the retracted height. The extended height is the maximum height the jack will be able to lift your trailer tongue.
Conversely, when thinking about retracted height, it isn’t so much about how low the jack can drop your trailer tongue (although that’s important, too). More precisely, it’s about how much ground clearance the bottom of the jack will have when your trailer is hitched up to your vehicle.
In other words, you need to make sure your jack won’t scrape on the ground while towing down the road, over bumps and on uneven terrain.
Enter the Swivel Jack!
Worried about your trailer jack scraping on the ground? Worry no more! The swivel trailer tongue jack is an answer to the problem of ground clearance for trailer tongue jacks.
Instead of just retracting the jack leg, a swivel jack is mounted on a rotating bracket. This adds the ability to swing the entire jack up 90 degrees, making it parallel with the trailer frame. Typically, a simple pull-pin keeps the jack in either the ready-to-use or stored position.
Swivel jacks are the perfect option for low-riding trailers, but it’s worth noting that they usually have a lower weight capacity (1,000 to 5,000 pounds lift) relative to other types of jacks.

Other Dimensions When Considering Jack Size
Bracket Height
The bracket height on a trailer jack is the measurement between the bottom of the jack and the mounting bracket. This distance (not unlike the retracted height) is important, particularly for non-swivel models. If your jack can’t rotate up and out of the way, it needs to provide enough clearance so that it won’t scrape on the ground when fully retracted.
The bracket height will provide an idea of how much clearance that will be once the jack is installed.
Tube Diameter
Some jacks, namely A-frame jacks, are designed to mount through a hole in the trailer frame. While other jacks mount onto the side of the frame with a vertical bracket, an A-frame jack has a horizontal bracket.
An A-frame jack is designed to drop into the trailer frame with the tube passing through the hole.
This makes that tube diameter important for A-frame jacks. The tube must fit the diameter of the hole. If the tube is too big, it won’t be able to drop into place. If it’s too small, the jack may have unnecessary wiggle room.
Before replacing an A-frame jack, measure the diameter of your trailer frame hole or your existing jack tube and make sure the new one will fit!
Head & Handle Clearance
One final thing to consider when shopping for a new jack is obstructions on the trailer. Are there components of your trailer, equipment that’s already installed, that will obstruct jack operation?
You’ll want to make sure the jack will have enough room to be installed without being blocked by a trailer tongue tool box or winch. And, once installed, will the jack handle have enough clearance from the objects around it to operate freely and safely? You don’t want to jam your hand against the LP tank every time you turn the crank!

This is an area where an electric jack should be carefully considered. You may be tempted to think that an electric jack doesn’t need as much clearance as a manual jack. While this is true most of the time, keep in mind that if you’re ever in an emergency situation and you need to use the backup hand-crank (yes, electric jacks come with a manual handle), you’ll want plenty of operating clearance.
How to Replace a Trailer Jack
Now that we’ve covered all the ins and outs of trailer jack options and what to look for when shopping for a replacement, let’s get into the actual process of replacing the old jack. We’ll cover the tools needed for the job, as well as the steps needed for installing a manual jack and electronic jack.
Tools Needed for Replacing a Trailer Jack
The tools you'll need to replace a trailer jack will depend on the type of jack you're installing. If you're installing a bolt-on jack, you'll need a socket set, drill and a few other common hand tools. If you're installing a weld-on jack, you may need professional assistance as it requires welding equipment and experience.
Here is a general list of tools needed for any trailer jack replacement:
- Floor jack
- Jack stands
- Wheel chocks
- Socket set
- Socket extension
- Power drill driver or impact drill
- Welding equipment (weld-on jacks only)
- Angle grinder (also for weld-on jacks)
Step-by-Step Trailer Jack Replacement
The steps outlined below provide a general overview of what a typical jack replacement might look like. While these steps are helpful for better understanding what’s involved, it's important to note that when replacing a trailer jack, you should always refer to the manufacturer's instructions for specific details.
Step 1: Jack up the trailer frame
Start by making sure your trailer is parked on level ground and that the wheels are chocked. Then, jack up the trailer frame with a floor jack (not the tongue jack) and support it with the proper jack stands under the frame.

Step 2: Remove the jack foot or wheel
If your jack has a foot or wheel on the bottom, you’ll want to remove it before uninstalling the complete jack assembly. Most jack feet and wheels are attached with a simple safety pin or cotter pin with clip. Remove the attachment and set it aside.
Step 3: Remove the bolts or welds
Most jacks are mounted onto the trailer using basic hardware – nuts and bolts. On A-frame jacks, bolts will be inserted vertically through the mounting bracket. On swivel-style jacks, mounting hardware may be installed horizontally. Some lightweight jacks are even attached using U-bolts.
If your jack is welded on, you will need to cut the welds using an angle grinder or similar tool. Remember, seek professional help if needed.
Once the hardware or welds are removed, remove the old jack and set it aside.

Step 4: Clean the mounting surface
Because they’re exposed to the outdoor elements and the road, trailers tend to get dirty. Before installing your new trailer jack, clean the mounting surface. If there’s only some dust present, wipe the area clean with a rag. If surface rust has started, you may wish to treat the area more thoroughly with an abrasive or even some touch-up paint.
Note, don’t paint any areas you intend to weld!
Step 5: Bolt or weld on the new jack
Position the new trailer jack onto the trailer frame and install the proper hardware. You’ll need to make sure all hardware is properly torqued. We recommend hand-tightening any hardware first, before torquing it to the final specs.
If your new jack requires welding, professional expertise is recommended for a proper install.

Step 6: Replace the jack foot or wheel
Reinstall the foot or wheel on the bottom of your new jack. Some jacks are not compatible with these types of accessories and others may include the foot or wheel in the package.
Step 7: Test the new jack
With the jack properly secured in place, you can use your floor jack to lift the trailer frame once more and remove the jack stands, allowing the trailer to return to its normal-use state. Before towing or even hitching up your vehicle, carefully test the new jack by raising and lowering it several times.
How to Install an Electric Trailer Jack
Installing an electric jack is similar to installing a manual jack, with a few key differences. The most significant one is accounting for the power source. Electric operation requires power, and that means wiring will be needed.
It’s also important to note that when installing an electric jack, you must also ensure that the power source is adequate for the jack's needs. This may require the installation of additional wiring or a battery specifically for the jack.
Step 1: Attach the jack to the trailer
Let’s assume your old jack is already removed (see steps above for reference). The first thing to do when installing your new electric jack is to position it on the trailer. If it’s an A-frame jack, simply drop the tube down through the pre-made hole in the trailer tongue. Then, bolt into place using the proper hardware. We recommend finger-tightening the hardware first, and then torquing it into place. Don’t overtighten!

Step 2: Install the foot
With the jack properly bolted into place, you can install the foot. Installing the foot is very simply using a safety pin with spring clip. Some foot pads have multiple mounting holes allowing you to set the desired height and gain more reach as needed.
Step 3: Connect the power wire
Run the power wire from the jack to the trailer’s positive battery terminal. Make sure the wire runs along a safe path where it won’t get crushed or rubbed against by other components on your trailer. Also, make sure the wire is securely attached and that any excess length is properly secured to the trailer, so it won’t scrape on the ground or get caught while towing.

Step 4: Test the jack
With your trailer wheels chocked, test your new jack to ensure it is working properly. Run the jack leg down to the ground so that it lifts the weight of the trailer tongue. Also retract the leg to make sure it goes all the way back up.
Before completing your installation, make sure you clear any tools or parts around your trailer.
Trailer Jack Upgrades to Consider
A simple, hand-cranked, manual jack is sometimes all you need for your towing setup, especially if you have a basic utility trailer.
However, a few upgrades can go a long way in the functionality of your trailer jack, particularly in the areas of convenience, efficiency of operation and speed. Here are some upgrades to consider for your trailer tongue jack.
Upgrading from Manual to Drill-Operated
Drill-operated jacks are more convenient and require less effort than manual jacks. They use an electric drill (not included) to power the jack, raising or lowering the leg. This is particularly useful for people who have difficulty with manual cranking or who have limited strength.
Drill-powered jacks also have a great advantage of speed. It takes less time to raise or lower the trailer with a power drill.
Drill-operated jacks are typically more expensive than standard manual jacks (and they require you to have your drill, sockets and a charged battery handy), but the convenience and ease of use they provide can be well worth the additional cost.

Upgrading to Electric
Like drill-operated jacks, electric jacks are also more convenient and require less effort than manual options. They have a built-in motor in the jack head that allows for fast, easy, push-button operation.
Electric jacks are even easier to operate compared to drill-powered, and they don’t require you to always have your drill with you. However, you do need a connection to your 12-volt battery on the trailer. Some electric jacks with auxiliary cords also provide the option to use your tow vehicle’s battery as a backup.
Some additional features that make electric jacks a great option are a built-in LED light to illuminate your work area – very useful when setting up your camper at dusk – backlit controls also for easy viewing in low light, and a battery life indicator to show how much charge is left in your trailer battery.

Upgrading to a Smart Jack
The ultimate electric trailer jack is the smart jack. A smart jack is an electrically powered jack that automatically raises or lowers to the right height with just a single press of the button. Instead of making you stand there and hold the button, all you have to do is press it once and the jack will adjust to the correct, pre-programmed height.
Smart jacks are the ultimate in convenience and accuracy. It’s easy to set the prescribed height to match your vehicle and trailer needs, and it lets you get back to your adventure faster than ever.
Keep in mind that smart jacks, like electric jacks, require a 12-volt battery supply, and they tend to be more expensive.

Adding a Jack Foot for More Stability
A jack foot is a small pad or platform that attaches to the bottom of your jack leg. It increases the jack's stability and helps to distribute the tongue weight of the trailer more evenly.
If your jack doesn’t have one, get one! It’s practically a must-have. A block of wood or 2x4 is no substitute for a good jack foot. It’s more stable and more convenient.
Many jacks are actually sold with a foot included but not all. If your jack doesn’t have one and you’re considering the upgrade, make sure you measure the diameter or dimensions of the leg tube before purchase. There are round options and square options. You need to make sure the foot will fit onto the bottom of your jack leg.

Most jack feet are easy to attach with a simple safety pin or bolt, and some come with multiple height adjustment options, allowing you to preset your jack for higher or lower requirements to accommodate your trailer. You can also choose from square pad options and round pad, as well as different sizes.
Adding a Jack Wheel for Mobility
Like a jack foot, a jack wheel is an accessory that mounts on the bottom of your jack leg. As you can guess, a wheel adds the capability of movement. It allows the trailer tongue to be moved or shifted more easily while still providing good stability for the trailer.
Jacks with wheels are a popular choice for boat trailers and other small utility trailers. The added mobility makes hookup a breeze, allowing the trailer tongue to be repositioned by hand with relative ease. In fact, if the trailer is lightweight enough, it even allows the entire trailer to be pushed around several feet if needed.

Two important things to keep in mind before buying a jack wheel: 1) Jack wheels have fairly low weight ratings. They’re not intended for medium to heavy trailers. Verify your tongue weight before choosing a jack wheel. 2) The added mobility is very convenient, but it can also lead to dangers if you don’t take the proper precautions. A fully mobile trailer can roll away down a slanted driveway or off a boat landing. Make sure you’re parked on level ground and chock your tires before leaving your trailer unattended.
Like jack feet, jack wheels come in different sizes and configurations, including single-wheel and double-wheel. Find one that fits your jack’s weight ratings, tube size and capabilities.
Tips for Successful Operation of Your Trailer Jack
Operating a trailer jack may seem like a simple and straightforward task, and for the most part, it is! But there are a few pro tips that will help promote safety and success every time. These tips apply to both manual and electric tongue jacks.
1. Raise and lower on firm, level ground
Any time you operate your trailer jack, it is important that you have a solid foundation. There’s a lot of weight bearing down on that jack leg, and if you’re parked on softer ground, the foot can actually start to sink. This not only deters your trailer tongue from being lifted up, but it can also make your trailer uneven and unsteady.
Play it safe and make sure the ground underneath your jack leg is firm, and that you’re parked on a level surface.

2. Chock the tires
Before operating your jack, it is a good idea to place wheel chocks under your trailer tires. As the trailer tongue raises or lowers, the weight of the trailer shifts. Chocking the tires helps ensure that the trailer will remain secure as you work.

3. Stand clear
Because trailers tend to be heavy, operating a trailer jack can be a dangerous activity. One of the best ways to keep yourself safe is to stand off to one side of the trailer tongue. Never stand over the trailer frame or place any part of your body under the trailer frame while raising or lowering. If something should fail during operation, you need to make sure you and those around you will be safe.

4. Keep wiring clear
If you’ve ever towed a trailer, you know that the trailer wiring harness tends to worm its way into all kinds of sticky situations. However, it’s important to keep it protected to ensure consistent operation of your trailer lights and other electrical functions. One of the ways you can protect it is by keeping it out of the way while jacking up your trailer tongue. Take care not to let the harness get wrapped up in the crank handle. And, be extra careful when lowering the jack foot to the ground that your wiring harness doesn’t get crushed underneath.

5. Take your time
Jacking up your trailer shouldn’t be a hasty activity. That scenic destination will still be there when you arrive! Take your time, go slowly, and raise or lower little-by-little. It’s a good idea to work incrementally, checking the jack leg, foot, coupler and other components every few inches to make sure things are working smoothly.

6. Make sure you’re unhitched
If you’ve ever operated a trailer coupler latch, you know that they can be stubborn. Before you start cranking the jack handle (or pressing the button), double-check to make sure your coupler is truly unlatched from the tow ball. If you start to raise the jack and the tow ball is being lifted up with the coupler, stop, lower the jack once more and triple-check the latch.
It is also a good idea to make sure you disconnect your safety chains and wiring harness before attempting to operate your jack to unhitch your trailer.

7. Fully retract your jack before towing
When hitching up your trailer to tow, always remember to fully retract the jack leg before travel. You want to make sure that the foot or bottom of the jack will have adequate clearance for safe towing. As one of the final steps in your hitch-up process, raise the jack leg completely and use the swivel feature if equipped.
Also note that on some trailers, it may be necessary to adjust the jack foot or wheel or even remove the attachment entirely to add extra clearance. Removing this attachment can also allow the leg to retract even further up into the jack on some models.

Hitching Up (and Unhitching) Using Your Jack
If you’ve never hooked up a trailer for towing, even if it’s a basic utility trailer, it’s a good idea to educate yourself on the process. You need to know what you’re doing each step of the way.
With the right know-how, you’ll enjoy a more confident tow, knowing that your trailer is hitched up correctly and your cargo is secure.
Step 1: Back up to your trailer
Start by backing your tow vehicle up to your trailer tongue. Be careful not to get too close! You want to leave a reasonable gap between the trailer hitch and coupler to make the proper height adjustments with your jack. Two feet should be enough.
You may want to ask a friend to help you during this step to watch and signal when you’re in position.
Step 2: Lift the trailer tongue
Assuming that you’re on firm, level ground and that the wheels of your trailer are chocked, lift the trailer tongue using your trailer jack. Crank the handle – or press the button if you have an electric jack – so that the jack leg begins to raise up the tongue. The goal is to lift the coupler high enough so that it will clear the hitch ball.
As you turn the jack, stop periodically to check for hangups or anything that may be out of place. You don’t want to snap a wiring harness or catch the coupler on the hitch until something pops. Also check to make sure that your trailer is remaining steady and stable.
Step 3: Line up the ball and coupler
With the coupler safely raised above the hitch ball, back the vehicle up the rest of the way. Go very slowly, and make sure your assistant is calling out clear signals to stop or proceed.
You need to back up the vehicle so that the hitch ball is directly underneath the trailer coupler. If you’re off by even an inch or two, you’ll need to pull forward and try again.
This is where a jack with a wheel is extremely helpful. It allows for a large margin of error when lining up the ball and coupler. If your coupler is off, the mobile trailer jack allows the tongue to be shifted with relative ease.
Step 4: Lower the trailer jack again
With the coupler lined up, lower it down onto the hitch ball by turning the jack handle back the other way or pressing the button on your electric jack. Remember once more to take your time and incrementally stop to check for pinch points and possible hangups. Make sure your wiring harness or safety chains aren’t going to get crushed by the dropping trailer tongue.
Raise the trailer jack leg, and stop once the coupler is resting completely on the ball. Hold off on retracting the leg completely for now.
Step 5: Engage the latch, chains and wiring
With the coupler properly seated on the hitch ball, engage the coupler latch and install the safety pin or lock. Then, attach the safety chains to the hitch, crossing them once underneath the coupler. Finally, plug in the wiring harness, pressing it firmly into place. Verify that no part of it will get pinched, stretched or scraped on the ground during travel.
Step 6: Retract the trailer jack fully
As a final step, you can now retract the trailer jack the rest of the way. It’s a good idea to keep it partially extended while you make the final hookups in your towing connection, but it should be fully retracted for travel.
Crank the handle or press the button to draw the leg up as far as it will go into the main tube. If you need to detach the foot or leg extension to gain the necessary clearance, do so at this time. If your jack has a swivel bracket, pull the pin and rotate the jack 90 degrees so that it is stored in the horizontal position. Make sure the pull-pin snaps back into place before towing.
Many jacks also have a foldable handle. Be sure that the handle is properly secured before you begin driving.

Using Your Trailer Jack to Unhitch
Unhitching your trailer follows a similar set of steps compared to hitching up. However, if you’ve never done it before, it’s worth listening to some expert advice and taking time to think each step through and familiarize yourself with the experience.
Step 1: Park on firm, level ground
Whether you’re at a campsite or parking in your own driveway, you want to be intentional about parking your trailer on level ground. This is especially important for successfully operating your trailer jack (not to mention leveling your RV!).
Before you settle on a parking spot, take a moment to get out of the vehicle, stretch your legs and scope out the terrain. Are you parked at an angle or slight incline? Are there any dips or potholes you could otherwise avoid?
Test the area directly below your trailer jack to make sure it’s solid ground and that it will properly support the tongue weight of your trailer.
As a final step before starting to unhitch, chock your trailer wheels to make sure it won’t shift or roll as you work.
Step 2: Extend your trailer jack
Before unhooking any chains or releasing the latches, you need to check that your trailer can properly support itself. Wheel chocks at the tires should be part of this support system.
Rotate the trailer jack into the vertical position if you have a swivel-style jack, and begin to lower the jack leg. Take extra care to check the area directly below the jack foot. Don’t let the wiring harness or any other components get in the way. Remember to keep your own extremities out of the way as well, and keep an eye out for loose debris. You don’t want the weight of your trailer resting on a random stick or piece of gravel.
Lower the jack leg only until it just touches the ground. Avoid putting any tongue weight on the jack at this time because it might cause problems when undoing the coupler latch.
Step 3: Unhook your wiring, chains and latch
With the trailer jack poised and ready to support the trailer tongue, you can begin the uncoupling process. Start with the wiring harness, as it is the most susceptible to damage. With the wiring safely out of the way, unhook the safety chains and wrap them neatly around the trailer tongue to keep them organized.
Finally, undo the coupler latch, removing the safety pin or lock first, followed by the latch itself.
Step 4: Raise the trailer tongue
With the trailer completely unhitched from the tow vehicle, raise the trailer tongue using your jack. Turn the handle or press the button to lower the jack leg. For manual jacks, you should begin to feel the tongue weight of the trailer shifting to the jack as the handle becomes more difficult to turn.
Raise the tongue until the coupler clears the hitch ball.
Step 5: Pull away from your trailer
With the coupler completely clear of the ball, pull your tow vehicle forward. You can leave it parked away from your trailer for the duration of your visit, and then follow the same procedures for hitching up again as outlined above.
After you’ve pulled your vehicle away from your trailer, you may wish to level your trailer out. It may be the case that clearing the hitch ball requires you to raise the trailer tongue high enough that your trailer becomes unlevel.
Use your trailer jack to lower the tongue once more until the trailer is level. If your jack has a foldable handle, fold it up after use to deter anyone from moving the jack while your trailer is parked.
Trailer Jack Maintenance & Care
Taking care of your trailer jack is fairly easy. In general, jacks are built to be tough and resilient to the outdoor elements with very little attention required from the owner. Here are a few recommendations to consider to keep your jack operating at its best for the long haul.
1. Keep dirt and debris off
Life on the road subjects a trailer jack to all kinds of dirt, debris, grime, moisture, road salt and more. Usually, these things aren’t much of a threat and an occasional cleaning of the jack is all that’s needed. Simply wipe down the components with a clean rag.
However, if you’ve been towing through some particularly thick elements, such as a muddy forest road or a dusty plain, it’s a good idea to clean your jack as soon as possible. Don’t let moisture or mud build up and linger. It will only detract from the life and usability of your jack, and it’s worth taking the extra 10 minutes to do a quick cleaning.
2. Lubricate the inner tube
Jacks are relatively simple mechanisms, comprised of an outer tube and inner tube or leg. There are also some gears inside the top or head of the jack, but these are usually well protected. To help increase the longevity of your jack and promote smooth, fluid operation, it is recommended that you lubricate the inner tube. A dry silicone lubricant works best.
To lubricate your jack leg, simply extend it all the way out so the inner tube is completely exposed. Then, apply your dry silicone lube. And that’s it! You can retract the jack leg and extend it a few more times to work in the lubricant and spray on more if needed.
Some jacks also come with an integrated grease zerk that allows for easy lubrication of the gears. You can periodically apply grease to the zerk using a grease gun.
3. Cover the jack head when not in use
As mentioned previously, trailer jacks are built for the outdoors. The inner components are usually well protected from the elements by the jack head or a built-in cap.
However, if you want some extra protection, you can purchase a jack cover. This is a simple weather-resistant bag that slips over the top of the jack and uses a drawstring to close around the tube. This adds extra protection from rain, snow, dust and pests, and is usually very affordable.
A jack cover may be a good addition to your trailer if you don’t tow it very often. If it sits parked outside most of the year without the jack being operated, a cover may help preserve the unit from buildup or corrosion. An alternative is to park your jack in a garage or under an overhang.
4. Disconnect your battery in winter
This maintenance tip applies to electric jacks only. Leaving electronics connected to a battery over winter is almost never a good idea. It can cause corrosion and battery-acid buildup, as well as damage to the electrical components.
In fact, leaving a battery outside and unused for the duration of winter – connected or not – is also a bad idea. It can damage the battery to the point of losing its ability to charge. Check out our complete guide to RV winterization for more tips and advice relating to trailer care during the winter months
5. Replace damaged components
It goes without saying, but you should never operate a trailer jack with broken components. If the jack is damaged in any way, it can lead to hazardous situations for you and those around you.
Life on the road can be tough, and sometimes, things break or wear out. The good news is, if your jack needs some help, you might not need a complete replacement! There are tons of different replacement parts and pieces for all types of jacks – from the tiniest cap setscrew to complete motor assemblies for an electric jack.
Before you buy replacement parts, be sure to consult your owner’s manual or the manufacturer to ensure you’re getting the right part for the job.
Common Trailer Jack Replacement Parts
The individual components on a jack can get damaged or worn out with enough use. This is particularly true for heavy-duty jacks that undergo a great deal of stress.
With the right DIY expertise, replacing individual parts, instead of the entire jack, can be a great way to save money. Below are some of the common parts that may need to be replaced on your trailer jack through the course of its life.
Trailer Jack Handle Replacement
Sometimes the handle on your jack can get bent, rusted or jammed beyond repair. Because many jack handles have a plastic or rubber grip, this grip can actually dry-rot and break off over time.
If your jack handle needs replacing, be sure to choose a replacement that matches the original. Removing the old handle can be tricky if the hardware has become corroded, but jack handles are usually attached with a simple nut, bolt and some washers.
Remove the hardware with the necessary socket or wrenches, and install the new handle. The new handle should come with new installation hardware. Be sure to use the new hardware, as the integrity of the old may be compromised.

Trailer Jack Foot or Wheel Replacement
A jack foot is at the bottom of the totem pole. Literally, it’s at the bottom of the trailer jack! As such, it takes the brunt of exposure to dirt, moisture and runaway road debris. Jack feet are constructed with this in mind, and most are made with quality steel and some kind of corrosion-resistant finish. However, wear and tear can take their toll and after a while you may notice some rust beginning to form on your jack foot.
Likewise, if your jack has a wheel, the wheel will get exposed to all kinds of abrasive and corrosive elements. The surface may begin to wear down eventually or the caster may become difficult to rotate, deterring the convenience of a mobile trailer tongue.
If you need to replace your jack foot or wheel, don’t worry, it’s very easy. Most jack feet are connected to the leg of the jack using a simple pin or bolt. Simply unclip the pin and slide it out. The jack foot should come off freely. To install the new one, position it on the bottom of the leg and install the new pin or bolt (using the old hardware isn’t recommended).
Follow the same process for replacing the jack wheel. Some replacement wheels come with a caster-style mounting bracket, while others include the wheel alone, as well as some basic hardware. In either case, remove the old hardware and wheel, and completely replace it with the new.

Pull-Pins Replacement
On swivel-style jacks, usually a pull-pin is used to retain the jack in either its vertical, in-use position or its horizontal, stored position. This pin may be attached to a chain or small cable that can become damaged or corroded over time. So long, pin! It may also be the case that the pull-pin itself becomes corroded or gets damaged.
When replacing a pull-pin, start by removing the chain or cable from its attachment point. There may be a small bolt or rivet connecting it to the main body of the jack. If you have a spring-style pull-pin, look for a small cotter pin holding the main pin in place. Simply pull out the cotter pin with a pair of pliers.
Once removed, discard all of the old components.
To install your new pull-pin, attach it to the same point on the jack, using the new bolt, rivet or cotter pin – whichever is included with your replacement parts. Make sure the chain or cable isn’t caught in any pinch points and that it will allow the swivel bracket to rotate freely once installation is complete.

Mounting Bracket & Hardware Replacement
Trailer jacks, particularly bolt-on-style jacks, attach to trailer frames in many different ways. Some use mounting bars with bolts that pass through. Others have a single mounting bracket. It may be the case that your trailer jack is in good working order but the mounting hardware attaching it to the trailer has been compromised. If so, replacement hardware may be purchased, whether it’s a specific component from the manufacturer or a more traditional form of hardware, such as standard nuts and bolts.
When replacing the hardware on your jack, it is important to take your time. Bolts may be corroded and difficult to loosen. We recommend using a penetrating oil to free up stubborn parts. Also, be sure to install all new hardware rather than reusing any of the old. The need for replacing these components doesn’t come often, and it pays to do a thorough job.

Top Cap Replacement
Some jacks come with a cap on top of the head or main tube that allows access to the internal mechanisms, such as gears, bearings or even a motor. Many times, this cap is constructed from plastic.
If you have a damaged top cap, don’t wait to replace it. Rain and other elements can quickly wreak havoc on your jack’s internal components, seeping down through the cracked cap and corroding the gears.
Replacing the top cap is usually very easy. Most are held on by a couple small bolts or a set screw. Remove the attachment hardware, followed by the cap itself. Then, install the new cap, using the hardware included with it.

Gears & Bearings Replacement
One of the more difficult jobs when replacing components on your trailer jack is replacement of the gears or bearings. While the parts themselves can be quite affordable, getting them installed may be more than you bargain for. Depending on your jack and level of expertise, you may wish to seek professional help or even replace your entire jack instead.
Jack replacement gears usually come with two gears and two pins. To install them, you’ll need to access the existing gears within the jack head. The pins will need to be removed to allow the old gears to be uninstalled. Be sure not to reuse the old gears or pins – only the new ones.
Bearings can likewise be difficult to replace. If you don’t feel confident in your abilities to complete the job, bring it to a professional. It’s better to have the work done right and enjoy long-lasting results versus doing the job poorly only to require another replacement before long.

Trailer Jack FAQs
- What size jack do I need for my trailer?
You need to select a trailer jack rated with a lift capacity to meet or exceed the maximum tongue weight of the trailer. You also need the jack to be tall enough to accommodate the ride height of the trailer. If the jack is too short or too tall, the trailer will not be level and coupling or uncoupling may be impaired. - What are the jacks on a trailer called?
The primary jack on a trailer is called the tongue jack. The tongue jack is positioned at the front of the trailer frame (i.e. the tongue). Trailers can also have stabilizing or scissor jacks, as well as leveling jacks. Landing gear is a special type of jack used on 5th wheel trailers. Floor jacks and jack stands are not strictly part of the trailer but may be used as tools during maintenance. - Are all trailer jacks the same?
There are many styles and sizes of trailer tongue jacks, but most of them operate using the same basic mechanism and principles, namely a right-angle gearbox. Other types of jack mechanisms include hydraulic, pneumatic and scissor lift. - Are all trailer jacks the same size?
No, trailer jacks range in size and weight capacity, depending on style, construction and trailer application. Jacks can be anywhere from 10” to over 40” long, and max lift capacities can range from 1,000 to 10,000 lbs. or higher. - What is the difference between stabilizing jacks and leveling jacks?
Stabilizing jacks and leveling jacks are not the same thing. Stabilizing jacks are used to stabilize an RV once it’s set up and leveled, keeping the trailer from shifting. Leveling jacks are used to correct an RV’s position once parked, bring the trailer to a level position and accommodating for unevenness in the ground. - What jack do I use for a camper trailer?
Most camper trailers use an A-frame jack, whether manual or electric. However, camper trailer can mean a bumper-pull travel trailer, or it can mean a 5th wheel, in which case landing gear would be needed. Some smaller camper trailers, such as pop-up campers and teardrop camper may use a swivel jack. - Why do people put blocks under trailer jacks?
Blocks are used under a jack to help stabilize the trailer. This is especially important if the jack does not have a footpad. A jack block provides a more stable surface compared to gravel, dirt or grass. Blocks are also used at times to allow proper lift height if terrain prevents proper coupling or uncoupling. - Are electric trailer jacks worth it?
Electric trailer jacks are worth the investment if you own a larger trailer and tow often. They are especially useful on travel trailers and other RVs. An electric trailer jack costs more up front and requires a 12-volt power supply, but they offer convenience and ease of use far beyond a manual jack. - How do you attach a jack to a trailer?
A jack can be attached to a trailer in one of two ways. It is either bolted on or welded on. A jack is always attached to the trailer’s frame. Some jacks are designed to attach using a bracket, and some attach directly using the body of the jack. A-frame jacks are designed to pass through a hole in the trailer tongue. - Do I need to grease my trailer jack?
Greasing the jack leg, gears and other moving pieces can help maintain optimal performance and long-lasting operation. Some jacks have an integrated grease zerk to lubricate the cranking mechanism directly. Always consult your owner’s manual for specific instructions on your unit.
In conclusion, your trailer jack is an essential part of your towing setup. When it comes time to replace a trailer jack, it is important to consider the different styles, mounting options, dimensions and capacities available. Additionally, make sure to choose the right tools and follow the manufacturer's instructions for the replacement process. By considering these factors, you can ensure that your new jack will meet the needs of your trailer and provide the stability and convenience you need while towing.
Disclaimer: These photographs, recommendations, and approximations are intended for demonstration purposes only and do not reflect the specifications of any particular tow vehicle, recreational vehicle, or trailer. Always consult the manufacturer’s Owner’s Manual.

